|
PaintShopPro ***
Calie Traduction©Violette *** This tutorial is made with PSP XII but can be carried out in other versions too *** Supplies :
***
***
1 - Open your tubes and close duplicate originals
selection "Vyp_selection_calie" extract to your PSP selection folder *** 2 - Set foreground on color #d3eed2 and set background on color #7ea67e
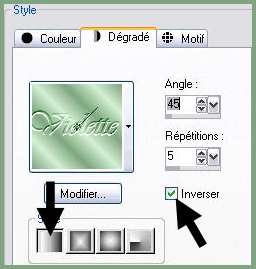
3 - Configure gradient: style linear/ angle: 45°/Repeats: 5/ Invert not checked
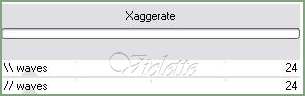
4 - Open a transparent image of 750 x 500 pixels / fill with gradient Adjust/Blur/Gaussian Blur : 255 - Pluggin/Funhouse/Xaggerate :
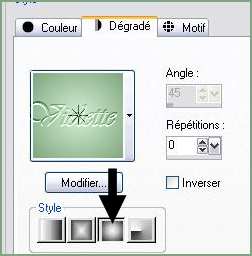
6 - Layers/New Layer /fill the canvas with the gradient halo /repeat: 0/ Invert not checked
7 - Effects/Texture Effects/ Blind:
Adjust / Sharpen / Sharpen
8 - Open the mask "mask_vyp_calie.jpg" Layers/New Layer mask / from an image/mask : "mask_vyp_calie.jpg" invers cheched Layers/Delete/Layers/merging the group
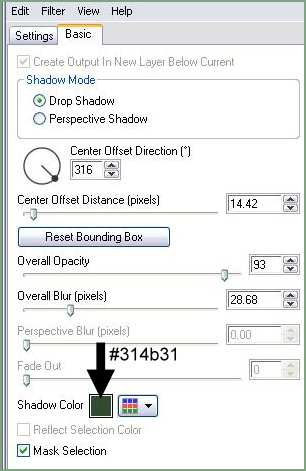
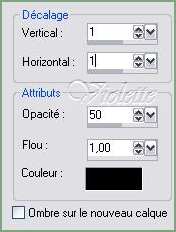
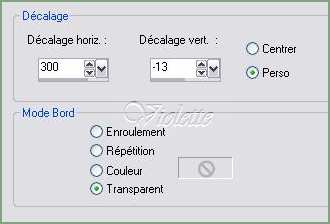
*** 9 - Effects/3D Effects/Drops Shadow : 1/1/50/1 color #4e724e
Repeat with negative values: -1 in vertical and horizontal shift
10 - Layers/New Layer 11 -Selection/charge/charge a selection/charge starting from the disc to choose "vyp_calie1.PspSelection"fill the canvas color #d3eed2
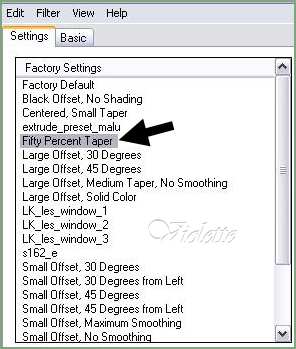
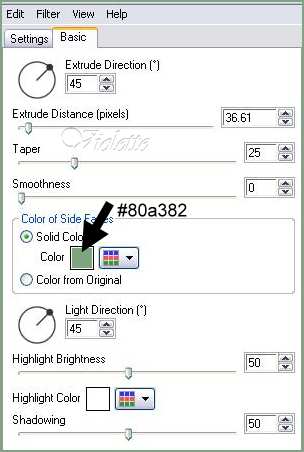
12 - Effects/Alien Skin Eye Candy Impact /Extrude: Onglet Settings : Fiffy percent Taper
Onglet Basic :
13 - Effects/Alien Skin Eye Candy Impact /Drop Shadow: Onglet Settings : Drop Shadow ,Blurry Onglet Basic :
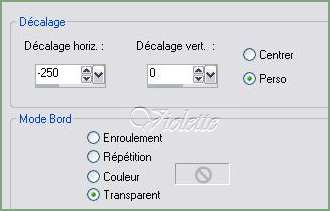
14 - Open the "Doddle.pspimage" tubeEdit/Copy/Edit/Paste as a new layer Effects/Image Effects/Offset: -250/0/ Custom/Transparent
15 - Effects/3D Effects/Drops Shadow : 1/1/50/1 color #000000
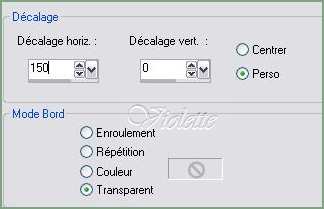
16 - Open the "Ann_230607_celebs_096_penelopecruz_tdstudio.pspimage" tubeEdit/Copy/Edit/Paste as a new layer Image/Resize 85 %/ resize all layers not checked x 2Effects/Image Effects/Offset: 150/0/ Custom/Transparent
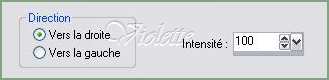
17 - Duplicate/ close the copie/Activate the original tubeAdjust/Blur/Gaussian Blur : 25 Effects/Distortion Effects/Wind: from right at 100
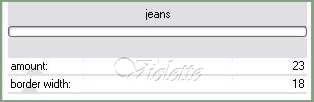
18 - Effects/pentacom/jeans : 23/18
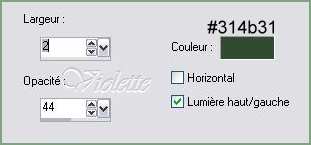
19 - Effects/Edge effects/Enhance 20 - Effects/Image Effects/Offset:
Blend Mode on : Luminance (Legacy)
21 - Activate the copy Effects/Alien Skin Eye Candy Impact /Perspective Shadow: Drop Shadow ,Blurry
réglages identiques à ceux du n° 13
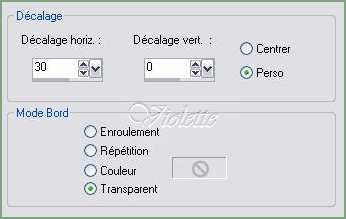
22 - Open the "Mtm_blomen_160-small_tube-27_juni_2008 .pspimage" tube Edit/Copy/Edit/Paste as a new layer Effects/Image Effects/Offset:
Blend Mode on : Luminance (Legacy) Duplicate
Calques/Fusionner le calque du dessous
23 - Effets/Alien Skin Eye Candy Impact /Perspective Shadow: Drop Shadow ,Blurry réglages identiques à ceux du n° 13
24 - Image/Add borders: 3 pixels color #314b31 Select the edge with magic wand Effects/Screenworks/Boxer Dot Select/None
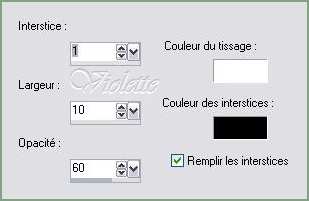
25 - Image/Add borders : 35 pixels coulor #d3eed2 Select the edge with magic wand Effects/Texture Effects/Weave
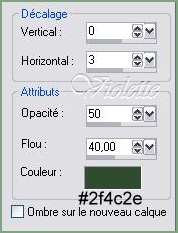
Select/Invers 15 - Effects/3D Effects/Drops Shadow : 0/3/60/40 color #2f4c2e
Repeat with negative values: -3 in vertical and horizontal shift Select/None
26 - Image/Add borders: 3 pixels color #314b31 Select the edge with magic wand Effects/Screenworks/Boxer Dot Select/None
27 - Activate your Text tool /Font Romantically Yours/ Vectorial Background on color: #000000 Type: Calie Direction: vertical/Crenage : -100
Layer palette/ right-click on Vector 1/ Convert to rasterlayer Give a dropshadow : 1/1/60/1/color #9e786b
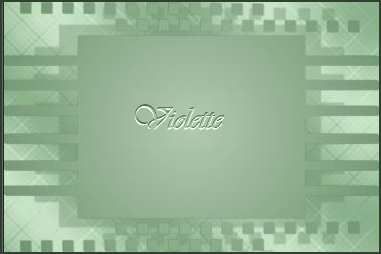
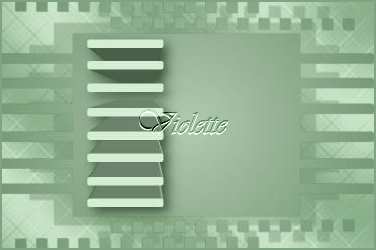
28 - Type your name 29 - Layers / Merge/ Merge all 30 -Exported JPEG Optimiser
Another version:
This tutoriel is of my creation It is strictly interdict to copy it or to distribute it on the Net *** July 9, 2008 ***
|