PaintShopPro
***
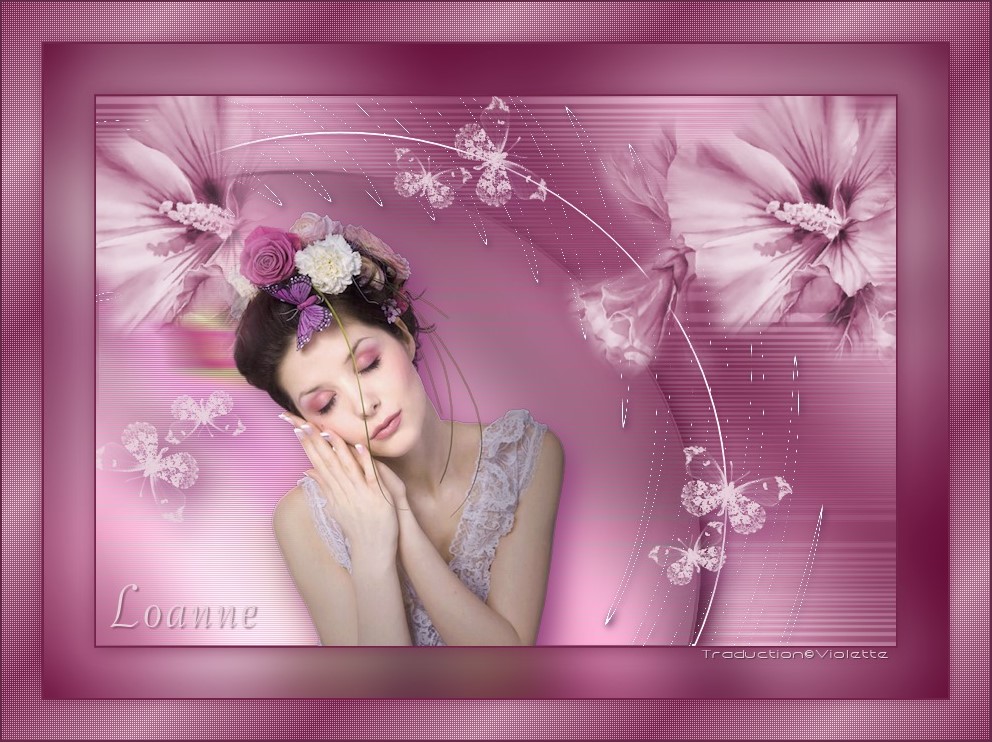
![]()
![]()
![]()
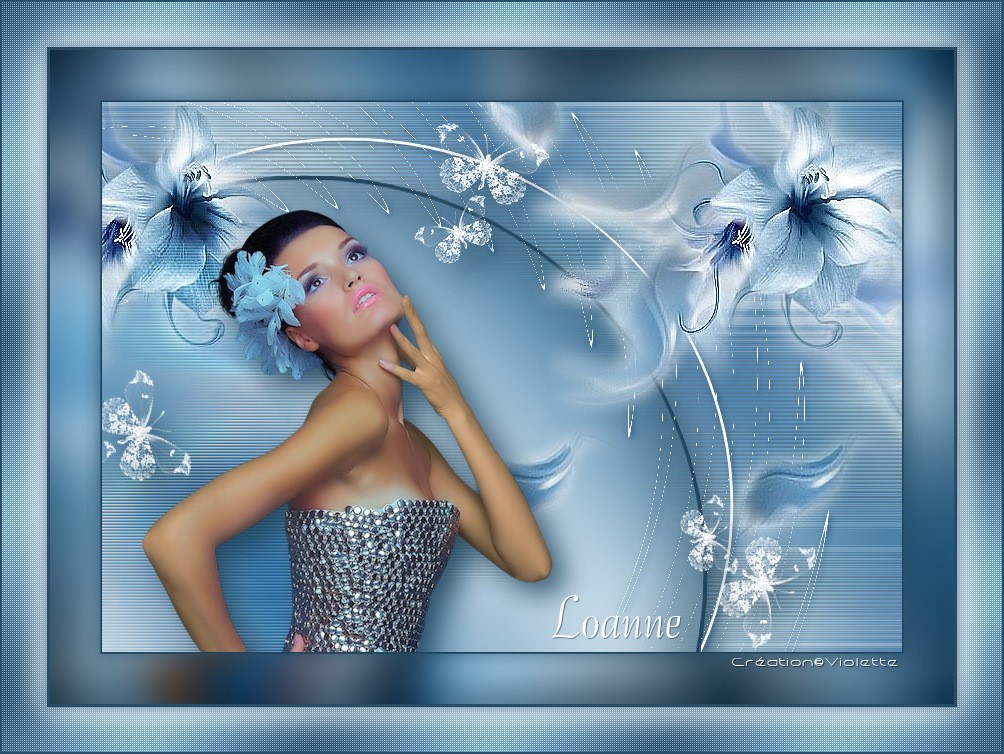
Loanne
***
This tutorial is made with PSP XII but can be carried out in other versions too
***
Supplies to make this tutorial
Supplies :
** Pluggin VM Extravaganza ICI - install in to your psp plug in folder
** Pluggin VM Distorsion ICI - install in to your psp plug in folder
** Pluggin Alien Skin Eye Candy Impact 5 ICI - Preset : ICI install in to your psp plug in folder
** Vyp_Selections_Loanne ICI - Install into your psp select folder
** Tube fleur de Silke ICI - Thank you ICI
** Pinceaux papillons ICI Install into your psp brush folder
** Tube to your choice
** Font ICI - place in the file Font of Windows or to open on the desk
***
|
|
Cette flèche pour marquer votre ligne
Clic gauche pour la déplacer |
***
1 - Open your tubes and close duplicate originals
Put your pluggins in the Pluggin folder of My PSP Files
***
2 - Set foreground on color #cfe0eb and set background on color #5c90b4
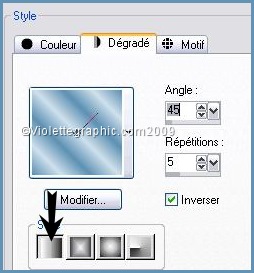
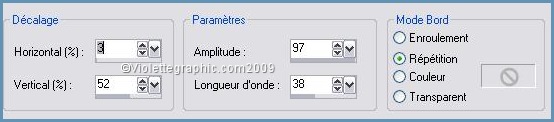
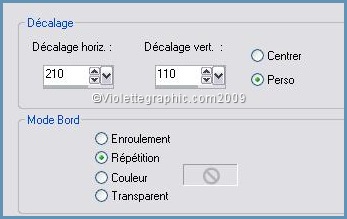
3 -
Configure gradient: style linear/angle :45°/ Repeats: 5/ Invert checked
4 - Open a transparent image of 800 x 550 pixels
fill with gradient
Adjust/Blur/Gaussian Blur :
30
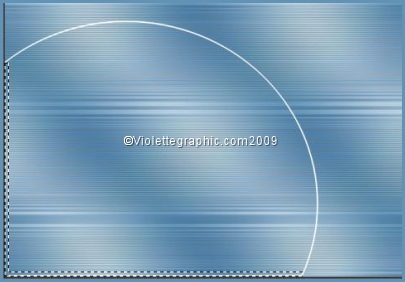
5 - Layers/Duplicate
Image/Mirror
6 - Effects/VM Extravaganza/Stay In Line!
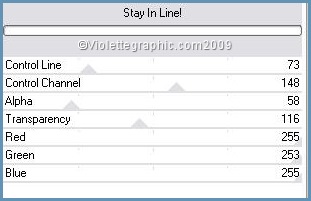
Blend Mode on: Multiply
Opacity to 66%
Adjust/Sharpen/Sharpen
7 - Layers/New Layer
8 -
selection/charge/charge a selection/charge starting from the discto choose selection "Vyp_Loanne01.PspSlection"
9 - Fill with color #ffffff
10 -
Selections/Modify/Contract to 2 pixelshit your delete key
Select/None
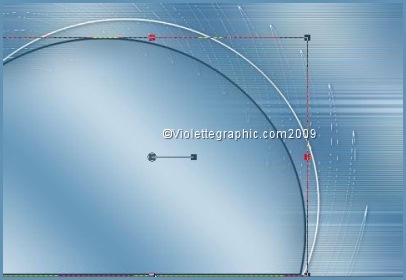
11 - Activate the Selection Tool trace two selections on the edges
hit your delete key
Select/None
12 - Layers/Duplicate
Effects/Distortion Effects/Weaves :
13 - Activate layer 3
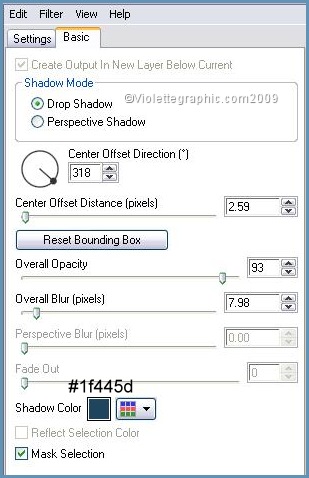
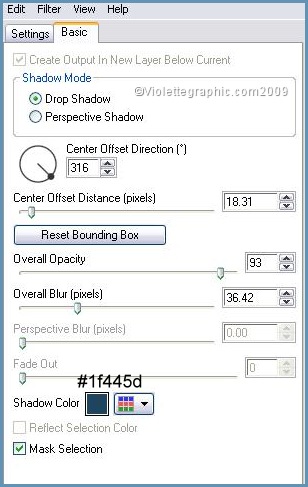
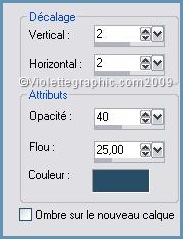
Effects/Alien Skin Eye Candy Impact /Perspective Shadow /Drop Shadow,Lowest
search your preset "Vyp_shadow_Loanne.f1s" /OK
Onglet basic :
14 - Activate layer 4
Effects/Alien Skin Eye Candy Impact /Perspective Shadow /Drop Shadow,Lowest
search your preset "Vyp_shadow_Loanne.f1s" /OK
Onglet basic : see n° 13
***
15 - Layers/New Layer
16 -
selection/charge/charge a selection/charge starting from the discto choose selection "Vyp_Loanne02.PspSlection"
17 - Fill with color #1f445d
18 -
Selections/Modify/Contract to 4 pixels
19 - Fill with linear gradient
Adjust/Blur/Gaussian Blur :
30
20 - Activate the
Raster Deform Tool
![]() extend to the bottom of work
extend to the bottom of work
Select/none
21 - Effects/Alien Skin Eye Candy Impact /Perspective Shadow /Drop Shadow,Blurry
search the preset "Vyp_shadow_Loanne.f2s" /OK
Onglet basic :
22 - Open your tube
Edit/Copy/Edit/Paste
as a new layer
Image/Resize 85 %/
* no move the tube *
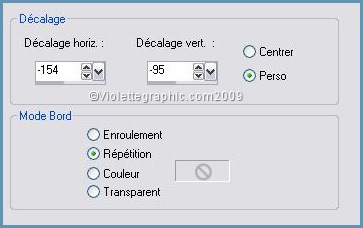
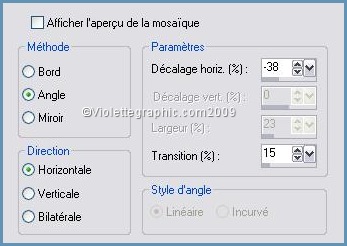
Effects/Image Effects/Offset: -154/-95/ Custom/Repeat
23 - Layers/Duplicate
closed the copy
Activate the original tube
Adjust/Blur/Motion/Blur:
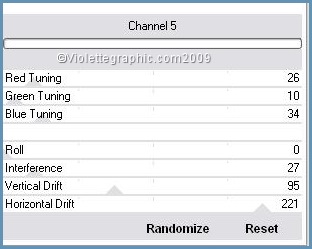
24 - Effects/VM Distorsion/Channel
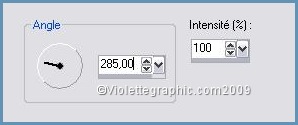
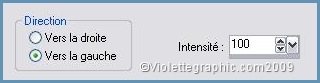
25 - Effects/ Distorsion Effetcs/wind to left:
Blend Mode on : Overlay
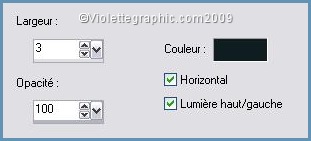
26 - Effects/Texture Effects /Blinds:
27 -
Activate the copyEffects/Alien Skin Eye Candy Impact /Perspective Shadow /Drop Shadow,Blurry
rechercher votre preset "Vyp_shadow_Loanne.f2s" /OK
28 -
Activate layer 4Layers/Arrange/Move down
twice
***
28 - Open the "SKF-Flower117.pspimage" tube
Edit/Copy/Edit/Paste as a new layer
Image/Flip
Effects/Image Effects/Offset: -154/-95/ Custom/Repeat
29 - Duplicate
Effects/Image Effects /Seamless Tiling
30 - Activate the pincel tools/search your pincel : "Vyp-papillon.PspBrush"
settings:
![]()
place the butterflies as on the model
Repeat
Alien Skin Eye Candy Impact /Perspective Shadow /Drop Shadow,Blurrysettings N° 26
***
31 - Image/Adds Borders : 2 pixels color #1f445d
Edit/Copy
32 - Image/ Adds Border: 50 pixels color white
Select the edge with magic wand
Edit/Paste Into Selection
Adjust/Blur/Gaussian Blur :
30
33 - Adjust/Brigthness and Contrast /Brigthness and Contrast

Sélec/Flip
34 - Effects/3D Effects/ Drop Shadow : 2/2/40/25/color #1f445d
Effects/3D Effects/ Drop Shadow : -2/-2/40/25/color #1f445d
select/none
35 - Image/Adds borders: 2 pixels color #1f445d
36 - Activate the text tool/Font Carmine Tango/ size : 55/Vectoriel
background color #ffffff
Enter the name:
LoanneLayer/Convert to rasterlayer
Effects/3D Effects/ Drop Shadow : 1/1/60/1/color #1f445d
37 - Type your name
38 - Layers / Merge/ Merge all
39 - Exported JPEG Optimiser
***
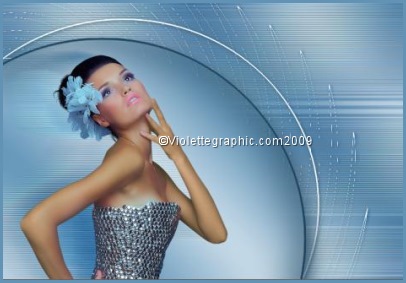
Another version:
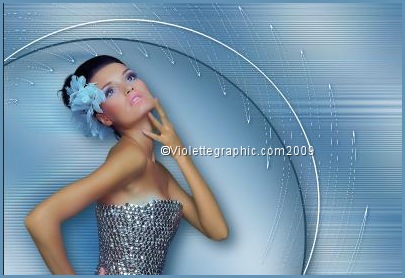
![]()
This tutoriel is of my creation It is strictly interdict to copy it or to distribute it on the Net
Traductions ©Violette
***
10 Janvier 2009
***
![]()